前言
上一章节介绍的登录注册是整个项目的根基,没有拿到 token,将无法进行后续的各种操作,如账单的增删改查。所以务必将上一章节好好地阅读与揣摩,为后面的学习做好铺垫。我们直接进入本次前端实战项目的主题,账单的增删改查之列表页。
本教程已有线上地址在线地址,同学们可以在实战部分,对照着线上页面进行学习。
知识点
- 单项组件抽离
- 列表页无限滚动
- 下拉刷新列表
- 弹窗组件封装
我们先来欣赏一下最终的页面效果:
列表页编写(静态部分)
按照正常的开发流程,我们先将静态页面切出来,再填入数据使其动态化。在此之前,我们已经新建好了 Home 目录,该目录便是用于放置账单列表,所以我们直接在 Home/index.jsx 新增代码。
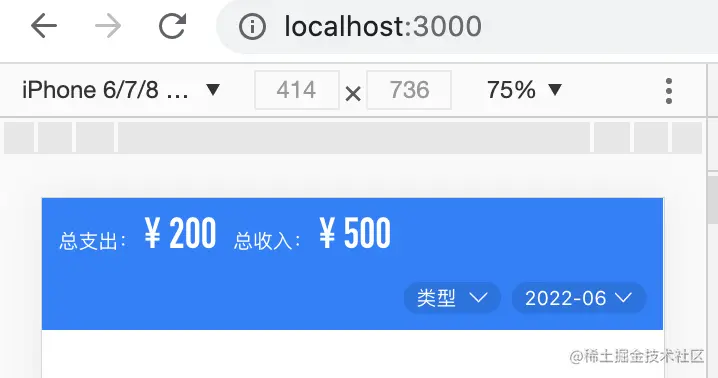
头部统计实现
列表的头部展示的内容为当月的收入和支出汇总,并且有两个列表条件过滤项,分别是类型过滤和时间过滤。
我们新增代码如下:
1
2
3
4
5
6
7
8
9
10
11
12
13
14
15
16
17
18
19
20
21
22
23
24
25
26
27
28
29
30
31
32
33
34
35
36
| import React from "react";
import { Icon } from "zarm";
import s from "./style.module.less";
const Home = () => {
return (
<div className={s.home}>
<div className={s.header}>
<div className={s.dataWrap}>
<span className={s.expense}>
总支出:<b>¥ 200</b>
</span>
<span className={s.income}>
总收入:<b>¥ 500</b>
</span>
</div>
<div className={s.typeWrap}>
<div className={s.left}>
<span className={s.title}>
类型 <Icon className={s.arrow} type="arrow-bottom" />
</span>
</div>
<div className={s.right}>
<span className={s.time}>
2022-06
<Icon className={s.arrow} type="arrow-bottom" />
</span>
</div>
</div>
</div>
</div>
);
};
export default Home;
|
文末已为同学们提供下本章节 demo 代码,样式部分不再详细说明。
代码分析:
header 采用 fixed 固定定位,将整个汇总信息固定在页面的顶部位置,这样后续列表滚动的时候,你可以方便查看当月的收入汇总,以及筛选当月消费类型和时间段的筛选。每个列表展示的是当月的收入与支出明细,比如 2021-06 的收入明细。
本次项目全程采用的是 Flex 弹性布局,这种布局形式在当下的开发生产环境已经非常成熟,同学们如果还有不熟悉的,请实现对 Flex 布局做一个简单的学习,这边推荐一个学习网站:
flexboxfroggy.com/#zh-cn
笔者当初也是通过这个网站的学习,入门的 Flex。
完成上述布局之后,页面如下所示:
列表页面实现
列表页面会用到 Zarm 组件库为我们提供的 Pull 组件,来实现下拉刷新以及无限滚动,我们先来将基础布局实现,如下所示:
1
2
3
4
5
6
7
8
9
10
11
12
13
14
15
16
17
18
19
20
21
22
23
24
25
26
27
28
29
|
const Home = () => {
const [list, setList] = useState([
{
bills: [
{
amount: "25.00",
date: "1623390740000",
id: 911,
pay_type: 1,
remark: "",
type_id: 1,
type_name: "餐饮",
},
],
date: "2021-06-11",
},
]);
return (
<div className={s.home}>
<div className={s.header}>...</div>
<div className={s.contentWrap}>
{list.map((item, index) => (
<BillItem />
))}
</div>
</div>
);
};
|
上述我们添加 list 为列表假数据,BillItem 组件为账单单项组件,我们将其抽离到 components 组件库,如下:
1
2
3
4
5
6
7
8
9
10
11
12
13
14
15
16
17
18
19
20
21
22
23
24
25
26
27
28
29
30
31
32
33
34
35
36
37
38
39
40
41
42
43
44
45
46
47
48
49
50
51
52
53
54
55
56
57
58
59
60
61
62
63
64
65
66
67
68
69
70
71
72
73
74
75
76
77
78
79
80
81
82
83
84
85
86
87
88
89
90
91
92
93
94
|
import React, { useEffect, useState } from "react";
import PropTypes from "prop-types";
import dayjs from "dayjs";
import { Cell } from "zarm";
import { useNavigate } from "react-router-dom";
import CustomIcon from "../CustomIcon";
import { typeMap } from "@/utils";
import s from "./style.module.less";
const BillItem = ({ bill }) => {
const [income, setIncome] = useState(0);
const [expense, setExpense] = useState(0);
const navigateTo = useNavigate();
useEffect(() => {
const _income = bill.bills
.filter((i) => i.pay_type == 2)
.reduce((curr, item) => {
curr += Number(item.amount);
return curr;
}, 0);
setIncome(_income);
const _expense = bill.bills
.filter((i) => i.pay_type == 1)
.reduce((curr, item) => {
curr += Number(item.amount);
return curr;
}, 0);
setExpense(_expense);
}, [bill.bills]);
const goToDetail = (item) => {
navigateTo(`/detail?id=${item.id}`);
};
return (
<div className={s.item}>
<div className={s.headerDate}>
<div className={s.date}>{bill.date}</div>
<div className={s.money}>
<span>
<img src="//s.yezgea02.com/1615953405599/zhi%402x.png" alt="支" />
<span>¥{expense.toFixed(2)}</span>
</span>
<span>
<img src="
<span>¥{income.toFixed(2)}</span>
</span>
</div>
</div>
{bill &&
bill.bills.map((item) => (
<Cell
className={s.bill}
key={item.id}
onClick={() => goToDetail(item)}
title={
<>
<CustomIcon
className={s.itemIcon}
type={item.type_id ? typeMap[item.type_id].icon : 1}
/>
<span>{item.type_name}</span>
</>
}
description={
<span
style={{ color: item.pay_type == 2 ? "red" : "#39be77" }}
>{`${item.pay_type == 1 ? "-" : "+"}${item.amount}`}</span>
}
help={
<div>
{dayjs(Number(item.date)).format("HH:mm")}{" "}
{item.remark ? `| ${item.remark}` : ""}
</div>
}
></Cell>
))}
</div>
);
};
BillItem.propTypes = {
bill: PropTypes.object,
};
export default BillItem;
|
通过 npm i dayjs -S 添加日期操作工具,移动端建议使用 dayjs,因为它相比 moment,体积小很多。
上述代码中,typeMap 为我们自定义的属性,它是一个简直对,key 为消费类型 icon 的 id,value 为消费类型的 iconfont 的值,如下所示:
1
2
3
4
5
6
7
8
9
10
11
12
13
14
15
16
17
18
19
20
21
22
23
24
25
26
27
28
29
30
31
32
33
34
35
36
37
38
39
40
41
42
43
44
45
46
47
48
49
50
51
52
|
...
export const typeMap = {
1: {
icon: 'canyin'
},
2: {
icon: 'fushi'
},
3: {
icon: 'jiaotong'
},
4: {
icon: 'riyong'
},
5: {
icon: 'gouwu'
},
6: {
icon: 'xuexi'
},
7: {
icon: 'yiliao'
},
8: {
icon: 'lvxing'
},
9: {
icon: 'renqing'
},
10: {
icon: 'qita'
},
11: {
icon: 'gongzi'
},
12: {
icon: 'jiangjin'
},
13: {
icon: 'zhuanzhang'
},
14: {
icon: 'licai'
},
15: {
icon: 'tuikuang'
},
16: {
icon: 'qita'
}
}
|
完成上述操作之后,我们重启浏览器,如下所示:
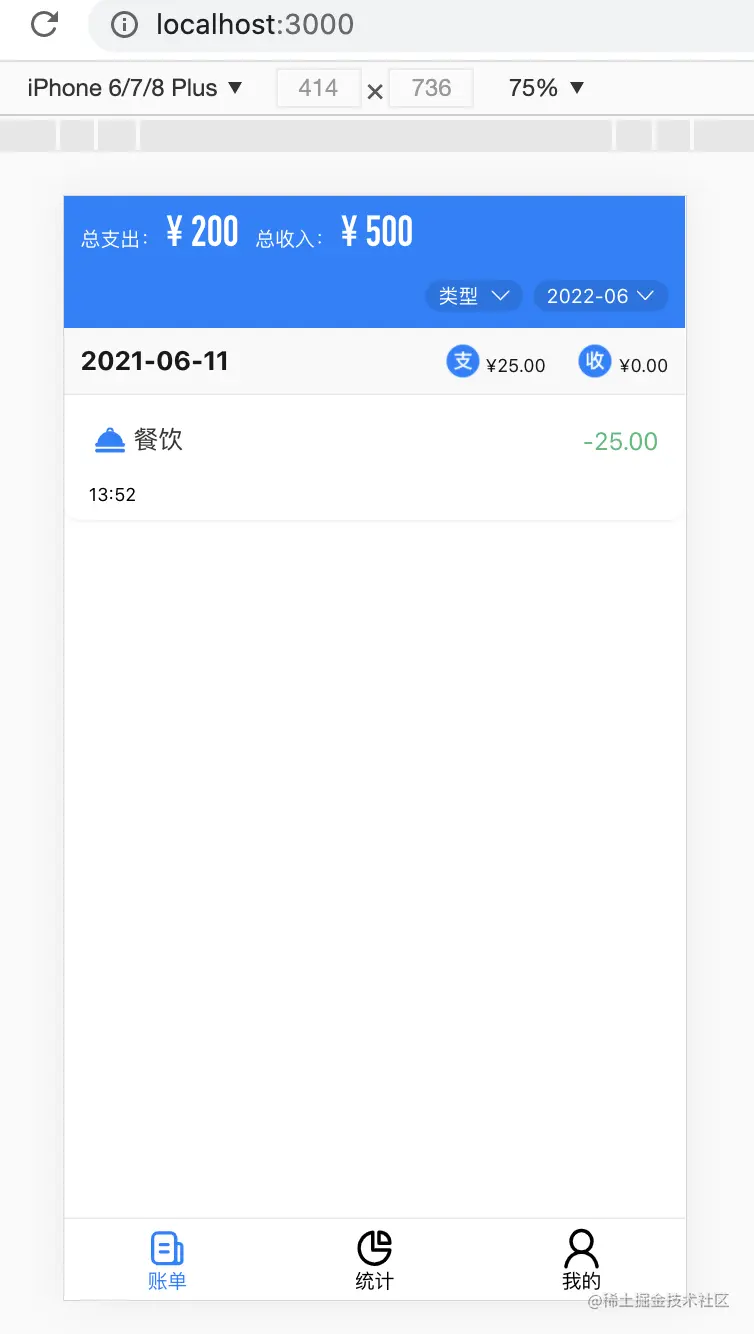
样式部分大家可以根据自己的喜好进行微调,不一定要一模一样,仁者见仁。
下拉刷新、上滑无限加载
我们修改 Home/index.jsx 如下所示:
1
2
3
4
5
6
7
8
9
10
11
12
13
14
15
16
17
18
19
20
21
22
23
24
25
26
27
28
29
30
31
32
33
34
35
36
37
38
39
40
41
42
43
44
45
46
47
48
49
50
51
52
53
54
55
56
57
58
59
60
61
62
63
64
65
66
67
68
69
70
71
72
73
74
75
76
77
78
79
80
81
82
83
84
85
86
87
88
89
90
91
92
93
94
95
96
| import React, { useState, useEffect } from 'react'
import { Icon, Pull } from 'zarm'
import dayjs from 'dayjs'
import BillItem from '@/components/BillItem'
import { get, REFRESH_STATE, LOAD_STATE } from '@/utils' // Pull 组件需要的一些常量
import s from './style.module.less'
const Home = () => {
const [currentTime, setCurrentTime] = useState(dayjs().format('YYYY-MM'));
const [page, setPage] = useState(1);
const [list, setList] = useState([]);
const [totalPage, setTotalPage] = useState(0);
const [refreshing, setRefreshing] = useState(REFRESH_STATE.normal);
const [loading, setLoading] = useState(LOAD_STATE.normal);
useEffect(() => {
getBillList()
}, [page])
const getBillList = async () => {
const { data } = await get(`/api/bill/list?page=${page}&page_size=5&date=${currentTime}`);
// 下拉刷新,重制数据
if (page == 1) {
setList(data.list);
} else {
setList(list.concat(data.list));
}
setTotalPage(data.totalPage);
// 上滑加载状态
setLoading(LOAD_STATE.success);
setRefreshing(REFRESH_STATE.success);
}
// 请求列表数据
const refreshData = () => {
setRefreshing(REFRESH_STATE.loading);
if (page != 1) {
setPage(1);
} else {
getBillList();
};
};
const loadData = () => {
if (page < totalPage) {
setLoading(LOAD_STATE.loading);
setPage(page + 1);
}
}
return <div className={s.home}>
<div className={s.header}>
<div className={s.dataWrap}>
<span className={s.expense}>总支出:<b>¥ 200</b></span>
<span className={s.income}>总收入:<b>¥ 500</b></span>
</div>
<div className={s.typeWrap}>
<div className={s.left}>
<span className={s.title}>类型 <Icon className={s.arrow} type="arrow-bottom" /></span>
</div>
<div className={s.right}>
<span className={s.time}>2022-06<Icon className={s.arrow} type="arrow-bottom" /></span>
</div>
</div>
</div>
<div className={s.contentWrap}>
{
list.length ? <Pull
animationDuration={200}
stayTime={400}
refresh={{
state: refreshing,
handler: refreshData
}}
load={{
state: loading,
distance: 200,
handler: loadData
}}
>
{
list.map((item, index) => <BillItem
bill={item}
key={index}
/>)
}
</Pull> : null
}
</div>
</div>
}
export default Home
}
|
在 utils/index.js 中添加一些 Pull 组件需要用到的常量,如下:
1
2
3
4
5
6
7
8
9
10
11
12
13
14
15
16
17
18
|
export const REFRESH_STATE = {
normal: 0,
pull: 1,
drop: 2,
loading: 3,
success: 4,
failure: 5,
};
export const LOAD_STATE = {
normal: 0,
abort: 1,
loading: 2,
success: 3,
failure: 4,
complete: 5,
};
|
代码中,已经为大家整理了详细的注释。无限滚动在移动端的应用随处可见,所以这块内容大家尽量能做到烂熟于心。如果有可能的话,希望你也能将其二次封装,便于多个地方的复用。我们打开浏览器查看效果:
同学们注意一下上述动图中的细节,滑到底部的时候,有一部分内容被遮挡住了,此时我们需要添加下列样式,进行修复:
1
2
3
4
5
6
7
8
9
10
11
12
13
14
| .home {
... .content-wrap {
height: calc(~"(100% - 50px)");
overflow: hidden;
overflow-y: scroll;
background-color: #f5f5f5;
padding: 10px;
:global {
.za-pull {
overflow: unset;
}
}
}
}
|
给 content-wrap 对应的标签一个高度,并且减去 50px 的高度,这样就不会被遮挡住下面一点的部分。
还有一个很关键的步骤,给 src 目录下的的 index.css 添加初始化高度和样式:
1
2
3
4
5
6
7
8
9
10
11
12
13
14
15
16
17
18
19
20
21
22
23
24
25
26
27
28
29
30
31
32
| body {
margin: 0;
font-family: -apple-system, BlinkMacSystemFont, "Segoe UI", "Roboto",
"Oxygen", "Ubuntu", "Cantarell", "Fira Sans", "Droid Sans",
"Helvetica Neue", sans-serif;
-webkit-font-smoothing: antialiased;
-moz-osx-font-smoothing: grayscale;
}
body,
html,
p {
height: 100%;
margin: 0;
padding: 0;
}
* {
box-sizing: border-box;
}
#root {
height: 100%;
}
.text-deep {
color: rgba(0, 0, 0, 0.9);
}
.text-light {
color: rgba(0, 0, 0, 0.6);
}
|
至此,滚动加载基本上就完成了。
添加筛选条件
最后我们需要添加两个筛选条件,类型选择和日期选择。
我们先来实现类型选择弹窗,我们采用的形式如下,底部弹出的弹窗形式,大致如下:
想要实现上述形式,我们需要借助 Zarm 组件库为我们提供的 Popup 组件,它的作用就是从不同方向弹出一个脱离文档流的弹出层。同样,我们使用组件的形式将其放置于 components 文件夹内实现,这样便于后续其他地方的使用。
新建 components/PopupType,在其内部新建 index.jsx 和 style.module.less 内容如下:
1
2
3
4
5
6
7
8
9
10
11
12
13
14
15
16
17
18
19
20
21
22
23
24
25
26
27
28
29
30
31
32
33
34
35
36
37
38
39
40
41
42
43
44
45
46
47
48
49
50
51
52
53
54
55
56
57
58
59
60
61
62
63
64
65
66
67
68
69
70
71
72
73
74
75
76
77
78
79
80
81
82
83
84
85
86
87
88
89
90
91
92
93
94
95
96
97
98
99
100
101
102
103
104
105
|
import React, { forwardRef, useEffect, useState } from "react";
import PropTypes from "prop-types";
import { Popup, Icon } from "zarm";
import cx from "classnames";
import { get } from "@/utils";
import s from "./style.module.less";
// forwardRef 用于拿到父组件传入的 ref 属性,这样在父组件便能通过 ref 控制子组件。
const PopupType = forwardRef(({ onSelect }, ref) => {
const [show, setShow] = useState(false);
const [active, setActive] = useState("all");
const [expense, setExpense] = useState([]);
const [income, setIncome] = useState([]);
useEffect(async () => {
const {
data: { list },
} = await get("/api/type/list");
setExpense(list.filter((i) => i.type == 1));
setIncome(list.filter((i) => i.type == 2));
}, []);
if (ref) {
ref.current = {
show: () => {
setShow(true);
},
close: () => {
setShow(false);
},
};
}
const choseType = (item) => {
setActive(item.id);
setShow(false);
onSelect(item);
};
return (
<Popup
visible={show}
direction="bottom"
onMaskClick={() => setShow(false)}
destroy={false}
mountContainer={() => document.body}
>
<div className={s.popupType}>
<div className={s.header}>
请选择类型
<Icon
type="wrong"
className={s.cross}
onClick={() => setShow(false)}
/>
</div>
<div className={s.content}>
<div
onClick={() => choseType({ id: "all" })}
className={cx({ [s.all]: true, [s.active]: active == "all" })}
>
全部类型
</div>
<div className={s.title}>支出</div>
<div className={s.expenseWrap}>
{expense.map((item, index) => (
<p
key={index}
onClick={() => choseType(item)}
className={cx({ [s.active]: active == item.id })}
>
{item.name}
</p>
))}
</div>
<div className={s.title}>收入</div>
<div className={s.incomeWrap}>
{income.map((item, index) => (
<p
key={index}
onClick={() => choseType(item)}
className={cx({ [s.active]: active == item.id })}
>
{item.name}
</p>
))}
</div>
</div>
</div>
</Popup>
);
});
PopupType.propTypes = {
onSelect: PropTypes.func,
};
export default PopupType;
|
老规矩,代码逻辑注释我都写在代码中,我坚持不把注释和逻辑分开,是因为我自己在看其他教程的时候,遇到代码中没写逻辑的文章,来回看下边的注释和上边的代码,有点乱,如果同学们有疑问,可以进群截图咨询,我在群里看到的话,随时进行解答。
类型弹窗组件写完之后,我们在 Home/index.jsx 内尝试调用它,如下所示:
1
2
3
4
5
6
7
8
9
10
11
12
13
14
15
16
17
18
19
20
21
22
23
24
25
26
27
28
29
30
31
32
33
34
35
36
37
38
39
40
41
42
43
44
45
46
47
48
49
50
51
52
53
54
55
56
57
58
59
60
61
62
63
64
65
66
67
68
69
70
71
72
73
74
75
76
77
78
79
80
81
82
83
| ...
import PopupType from '@/components/PopupType'
const Home = () => {
const typeRef = useRef();
const [currentSelect, setCurrentSelect] = useState({});
...
useEffect(() => {
getBillList()
}, [page, currentSelect])
const getBillList = async () => {
const { data } = await get(`/api/bill/list?page=${page}&page_size=5&date=${currentTime}&type_id=${currentSelect.id || 'all'}`);
// 下拉刷新,重制数据
if (page == 1) {
setList(data.list);
} else {
setList(list.concat(data.list));
}
setTotalPage(data.totalPage);
// 上滑加载状态
setLoading(LOAD_STATE.success);
setRefreshing(REFRESH_STATE.success);
}
...
// 添加账单弹窗
const toggle = () => {
typeRef.current && typeRef.current.show()
};
// 筛选类型
const select = (item) => {
setRefreshing(REFRESH_STATE.loading);
// 触发刷新列表,将分页重制为 1
setPage(1);
setCurrentSelect(item)
}
return <div className={s.home}>
<div className={s.header}>
<div className={s.dataWrap}>
<span className={s.expense}>总支出:<b>¥ 200</b></span>
<span className={s.income}>总收入:<b>¥ 500</b></span>
</div>
<div className={s.typeWrap}>
<div className={s.left} onClick={toggle}>
<span className={s.title}>{ currentSelect.name || '全部类型' } <Icon className={s.arrow} type="arrow-bottom" /></span>
</div>
<div className={s.right}>
<span className={s.time}>2022-06<Icon className={s.arrow} type="arrow-bottom" /></span>
</div>
</div>
</div>
<div className={s.contentWrap}>
{
list.length ? <Pull
animationDuration={200}
stayTime={400}
refresh={{
state: refreshing,
handler: refreshData
}}
load={{
state: loading,
distance: 200,
handler: loadData
}}
>
{
list.map((item, index) => <BillItem
bill={item}
key={index}
/>)
}
</Pull> : null
}
</div>
<PopupType ref={typeRef} onSelect={select} />
</div>
}
|
添加类型选择弹窗注意几个点:
1、使用 useState 声明好类型字段。 2、通过 useRef 声明的 ref 给到 PopupType 组件,便于控制内部的方法。 3、传递 onSelect 方法,获取到弹窗内部选择的类型。 4、useEffect 第二个参数,添加一个 currentSelect 以来,便于修改的时候,触发列表的重新渲染。
有一个有趣的知识点,这里和大家分享一下,你尝试去打印 typeRef 变量,如下所示:

可以看到,在 PopupType 组件内挂载的方法,可以在父组件内获取到,那么我们便可以直接把弹窗的显示隐藏参数放在子组件内维护,而不用每次都去在父组件声明 show 或 hide。
加完类型筛选之后,我们再将时间筛选加上,同样将时间筛选添加至 components 目录下,便于后续数据页面的时间筛选。
1
2
3
4
5
6
7
8
9
10
11
12
13
14
15
16
17
18
19
20
21
22
23
24
25
26
27
28
29
30
31
32
33
34
35
36
37
38
39
40
41
42
43
44
45
46
47
48
49
50
51
52
53
54
55
56
57
|
import React, { forwardRef, useState } from "react";
import PropTypes from "prop-types";
import { Popup, DatePicker } from "zarm";
import dayjs from "dayjs";
const PopupDate = forwardRef(({ onSelect, mode = "date" }, ref) => {
const [show, setShow] = useState(false);
const [now, setNow] = useState(new Date());
const choseMonth = (item) => {
setNow(item);
setShow(false);
if (mode == "month") {
onSelect(dayjs(item).format("YYYY-MM"));
} else if (mode == "date") {
onSelect(dayjs(item).format("YYYY-MM-DD"));
}
};
if (ref) {
ref.current = {
show: () => {
setShow(true);
},
close: () => {
setShow(false);
},
};
}
return (
<Popup
visible={show}
direction="bottom"
onMaskClick={() => setShow(false)}
destroy={false}
mountContainer={() => document.body}
>
<div>
<DatePicker
visible={show}
value={now}
mode={mode}
onOk={choseMonth}
onCancel={() => setShow(false)}
/>
</div>
</Popup>
);
});
PopupDate.propTypes = {
mode: PropTypes.string,
onSelect: PropTypes.func,
};
export default PopupDate;
|
底部时间弹窗逻辑和类型选择的逻辑相似,这里不做赘述,直接在 Home/index.jsx 中引入时间筛选框:
1
2
3
4
5
6
7
8
9
10
11
12
13
14
15
16
17
18
19
20
21
22
23
24
25
26
27
28
29
30
31
32
33
34
35
36
|
...
import PopupDate from '@/components/PopupDate'
const Home = () => {
...
const monthRef = useRef();
useEffect(() => {
getBillList()
}, [page, currentSelect, currentTime])
...
const monthToggle = () => {
monthRef.current && monthRef.current.show()
};
const selectMonth = (item) => {
setRefreshing(REFRESH_STATE.loading);
setPage(1);
setCurrentTime(item)
}
return <div className={s.home}>
...
<div className={s.right}>
<span className={s.time} onClick={monthToggle}>{ currentTime }<Icon className={s.arrow} type="arrow-bottom" /></span>
</div>
...
<PopupDate ref={monthRef} mode="month" onSelect={selectMonth} />
</div>
}
|
刷新浏览器如下所示:
最后不要忘记计算当前月份的收入和支出汇总数据,放置于头部,修改 Home/index.jsx 内的代码如下:
1
2
3
4
5
6
7
8
9
10
11
12
13
14
15
16
17
18
19
20
21
22
23
24
25
26
27
28
29
30
31
| ...
const Home = () => {
...
const [totalExpense, setTotalExpense] = useState(0);
const [totalIncome, setTotalIncome] = useState(0);
const getBillList = async () => {
const { data } = await get(`/api/bill/list?page=${page}&page_size=5&date=${currentTime}&type_id=${currentSelect.id || 'all'}`);
// 下拉刷新,重制数据
if (page == 1) {
setList(data.list);
} else {
setList(list.concat(data.list));
}
setTotalExpense(data.totalExpense.toFixed(2));
setTotalIncome(data.totalIncome.toFixed(2));
setTotalPage(data.totalPage);
// 上滑加载状态
setLoading(LOAD_STATE.success);
setRefreshing(REFRESH_STATE.success);
}
return <div className={s.home}>
...
<div className={s.dataWrap}>
<span className={s.expense}>总支出:<b>¥ { totalExpense }</b></span>
<span className={s.income}>总收入:<b>¥ { totalIncome }</b></span>
</div>
...
<div>
}
|
最终展示效果如下所示:
总结
本章节的内容,偏向实战,而实战部分代码在文章的重复率不可避免,这里大家把握好本章节两个重要知识点:
1、无限加载、下拉刷新。
2、公用组件提取,如弹窗组件、账单组件。
这两个知识点在实战中,用到的非常多,希望同学们能重视。